|
Instrument Project
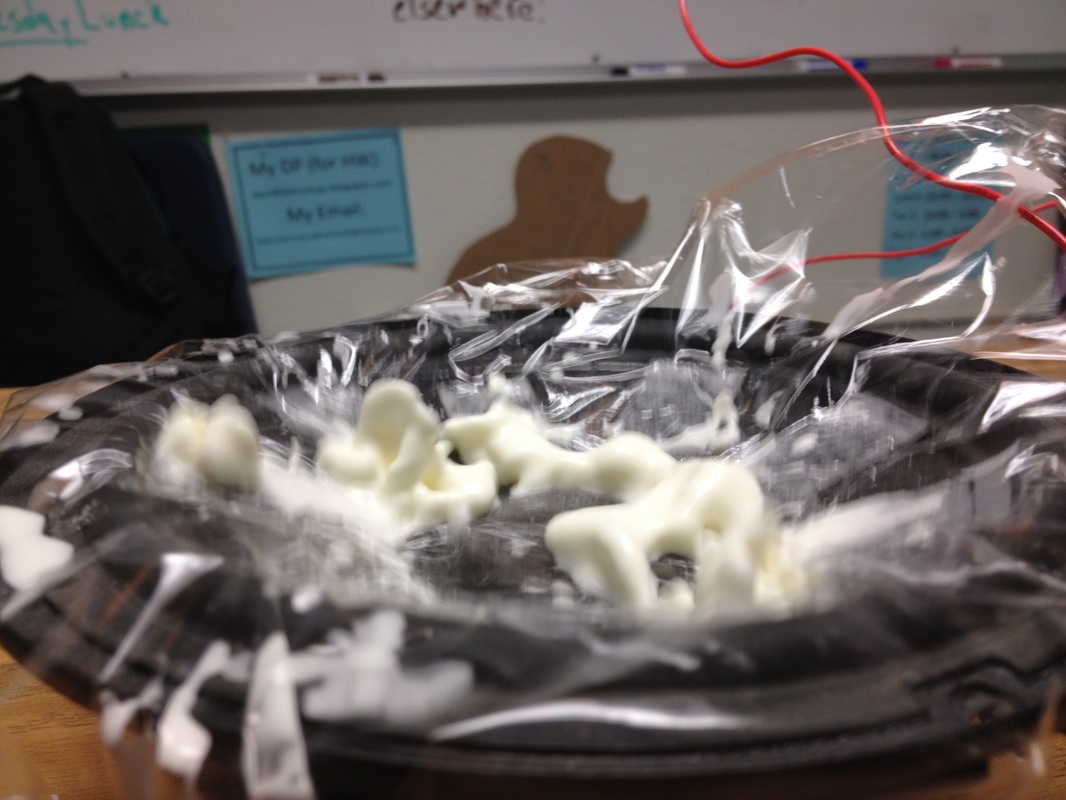
Our last project of the year was the sound project. For this project, my partner Avra Saslow and I made corn starch monsters. Corn starch monsters are basically a mixture of corn starch and water poured onto a speaker. When the speaker vibrates to create sound, it also vibrates the mixture, which, being a non-Newtonian fluid, is neither fully liquid or fully solid. The effect can be seen to the left and looks somewhat like monsters trying to escape the speaker.
The second part of this project was to make a scientific poster for exhibition night. On it we had a summary, a materials list, a physics concept section, references, and procedures. To read my project reflection in PDF format, click here. |
Rube Goldberg
We are currently studying simple machines and building Rube Goldberg machines. A Rube Goldberg does a simple task through multiple complex steps. My partner Ande Lloyd and I are using roughly 23 steps to make Waffles! We showed off our rube at an exhibition last night at the Durango Discovery museum. I think that our rube did pretty well for how complex it was, and it worked almost every time, plus the waffles were very popular :)
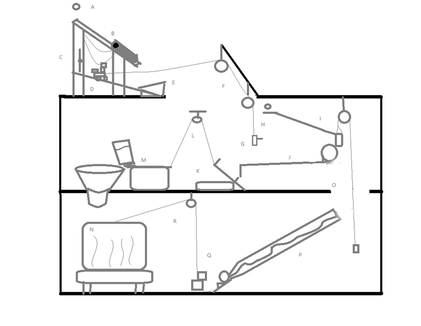
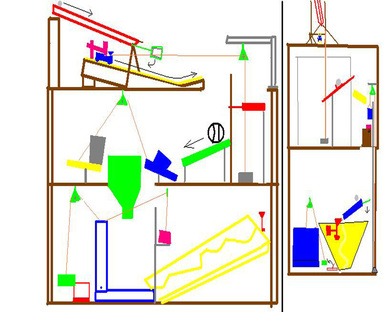
Here's description of what happens... Hand drops marble (A) that rolls down track into container (B), sliding it off the ramp. It swings and hits lever (C) starting train (D) which is attached to a pulley system(F). When train (D) goes off jump (E), it raises weight (G)which knocks marble (H). Marble (H) rolls down track (I) and into container. Container lowers and hits ball which rolls down tack (J). Ball hits lever (K) which pulls string and lets batter pour out w/ hinge (M) Batter pours into waffle iron (N). meanwhile, container (I) continues decent and knocks ball that rolls down curvy track (P), hitting larger ball that knocks weight out from under block (Q). weight raises and with pulley lowers lid. Revised Blueprint: The bottom picture is our final blueprint that we presented at exhibition. It had a few steps added on top of the original ones. The basic order is the same, but there are a few things such as levers to start balls rolling, a mousetrap to lower the lid, and a few others. |
|
Rocket Project
Rocket Project Reflection
The exhibition last night was fun, but our rocket didn’t do too well. The first launch was pathetic; our rocket went about two feet in the air and slammed down, breaking the nose cone off. If I was going to launch it again, I would just practice pulling the pins more and putting shims on the single nozzle so that it doesn’t leak. The second launch wasn’t much better, but we at least think that we know why. It seems like the force coming off the Launchpad was so great that it blew the nosecone off.
One thing that went well was that the second time we launched our rocket, it actually got off the launch pad (Not by much, but still… it’s better than nothing).
The thing that didn’t go well was that our rocket pretty much failed epically. Even though it launched the second time, it flipped and exploded after about 15 feet.
Our design didn’t really work, but I think that was more because of the Launchpad than our rocket.
The only thing I will change in my design is the spacing between the bottom bottles t make the rocket fit on the Launchpad better.
When my rocket was on the pad, I was excited and nervous, then disappointed when it didn’t launch.
Rocket Project
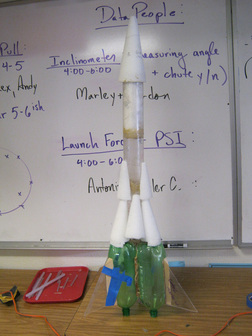
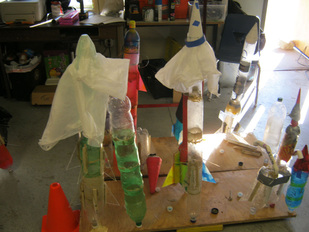
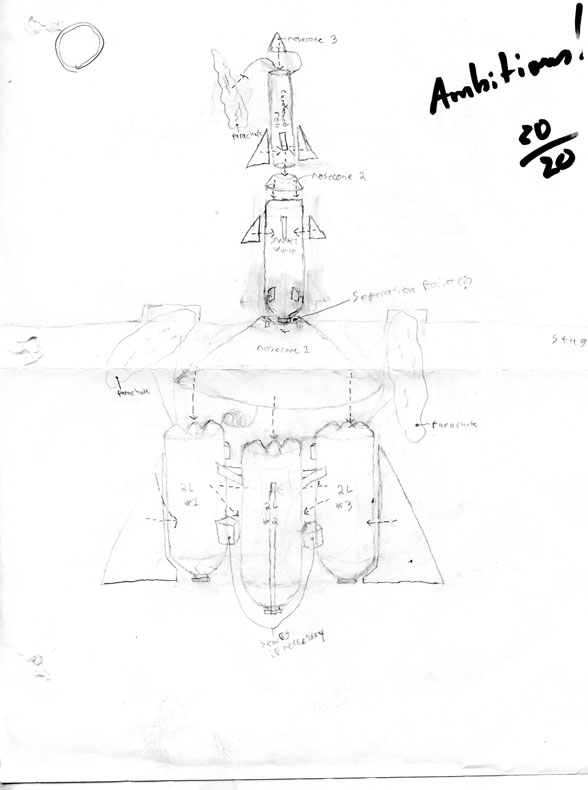
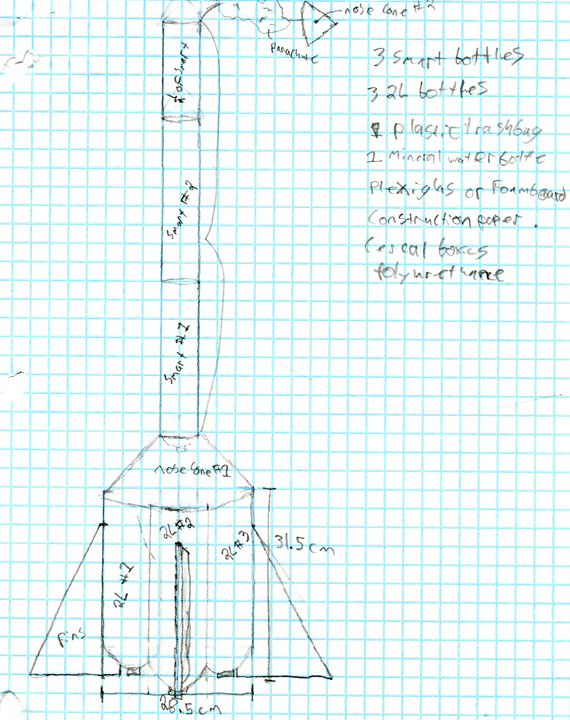
In physics, we are currently building bottle rockets. My partner and I have built a three nozzle rocket that is about two and a half feet tall (top right). We plan to fill it up halfway with water, pressurize it to 80 psi, and (hopefully) launch it into the sky tomorrow after school at my second Animas High exhibition. During the project, we went through many stages of designing and building. At the bottom right is a picture of some of my classmates rockets in all different stages of completeness. Below are two of our rocket designs, the left hand one a free hand drawing of my basic idea near the beginning of the project, and the right a scale drawing of our final project, showing about the same idea as our actual rocket. this was done a few days after the project started.
|
|
Cat Can Challenge
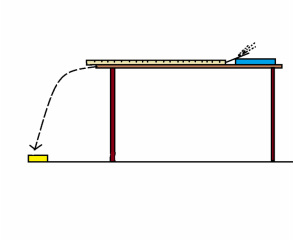
In this lab, our goal was to get a marble to roll off a table and land in a can using math skills. Below is my write up explaining the steps for rolling the marble, but using going off a cliff on a scooter into a pool instead of rolling a marble into a can.
Procedure for riding a scooter off a cliff (Weeeeeee… SPLAT!) 1. Measure the distance from the base of the ramp to the cliff edge. 2. Calculate your average velocity by timing how long it takes you to travel the distance from the bottom of the ramp to the cliff edge. Do this at least five times and average your times by adding them together and dividing them by five. Then divide the distance from ramp to cliff by your average time. This number is your average velocity. 3. Measure the height of the cliff in Meters. 4. Calculate the hang time by dividing the height of the cliff by half of 9.81 and then square root your answer (This number should be small). 5. Multiply your hang time by your average velocity. This number is how far away from the cliff you should put the kiddy pool. Put it about 20 cm closer to the cliff than the number you got said to account for air resistance. |
|
A Brief Summary of 9th Grade Physics so Far

We started off the year in physics with a week of significant figures and unit conversions, learning the basics for our entire year. We also covered Newton's laws in these first three weeks. after that, we moved straight in to nonstop labs! First we did a lab of our choice using the scientific method. my partner and I tested which design of boat would float longest while on fire. Although our initial experiment failed, we still learned several interesting things. For example, did you know that plastic burns better than balsa wood soaked in gasoline?
During the following weeks, we conducted the bounce lab, spark lab, cart lab, cat can challenge, and many others.
During the following weeks, we conducted the bounce lab, spark lab, cart lab, cat can challenge, and many others.
